


ActiveCampaign
ActiveCampaign integrates with LiveAgent to automate marketing, sales, and support processes. Manage customer subscriptions, connect with deals, and enhance wor...
2 min read
Boost your email marketing with AWeber’s seamless LiveAgent integration. Automate campaigns, retain customers, and drive sales effortlessly. Manage subscribers and track campaigns directly from your LiveAgent dashboard.
AWeber is an email marketing tool created by AWeber Communications in 1998. Email marketing is directly marketing a commercial message to a group of people using email. In its broadest sense, every email sent to a potential or current customer could be considered email marketing. AWeber claims to have more than 100,000 active customers today.
Start your free trial today and see results within days.
Your agents don’t have to switch between platforms to keep track of what’s happening with your email marketing. You can keep track of customer interactions and email campaigns in your ticketing dashboard. Managing subscribers within your helpdesk software has never been easier. Activating the AWeber plugin will allow you to subscribe and unsubscribe contacts to your email marketing lists directly from LiveAgent. In order to avoid sending spam emails, an opt-in email is sent when subscribing to a contact. (Subscription must be confirmed by the contact).
The latest tips and deals delivered straight to your inbox.
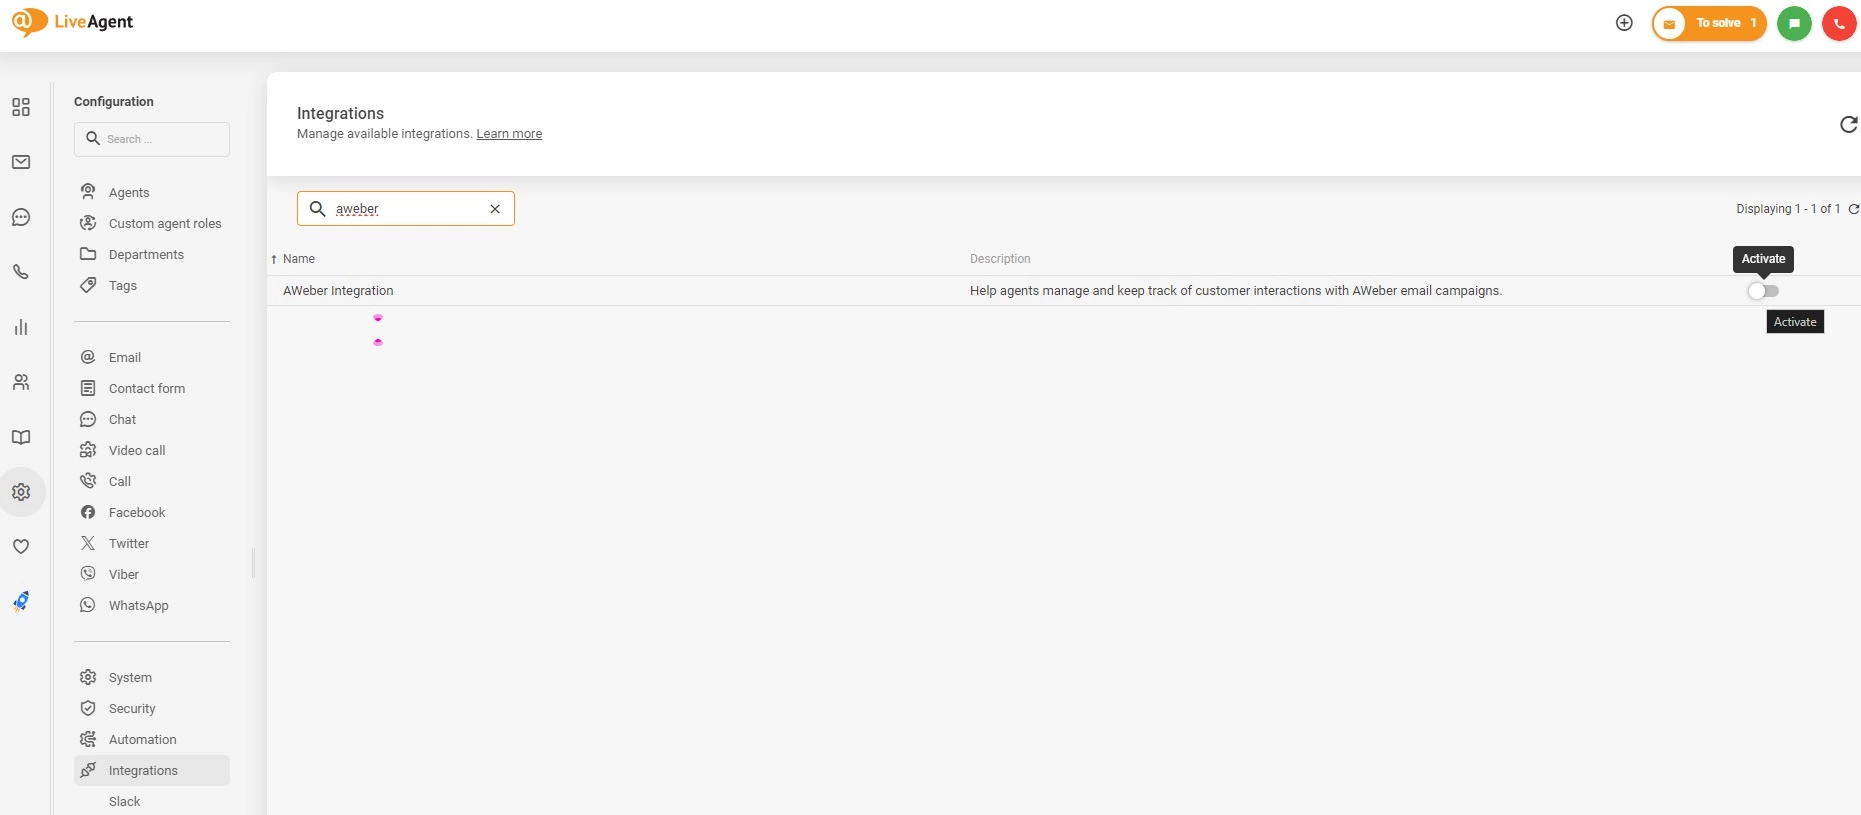
You can activate it via the native plugin available in your LiveAgent configuration. Go to Configuration > Integrations and find the AWeber Integration. Click on the switch to activate it.
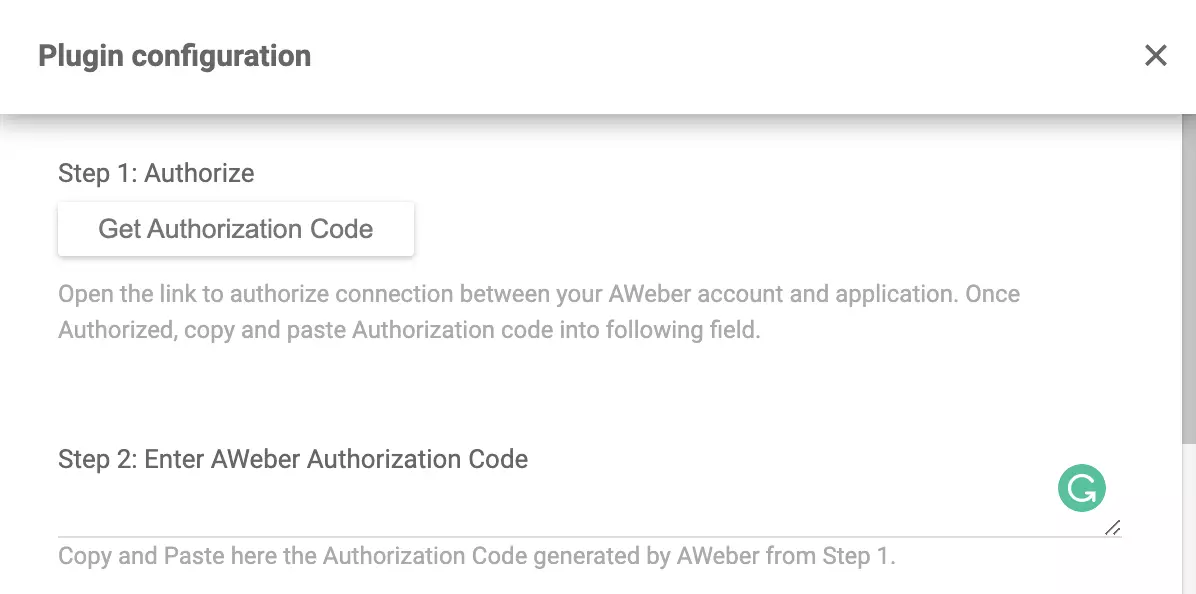
You can find the active integration at the top of the integration lists between other active plugins. Click on the Configuration cog icon next to the switch and a new settings window will open.
Click on Get Authorization Code and a new browser window will open up. Copy and paste the code you got into the Enter AWeber Authorization Code field and click on Save.
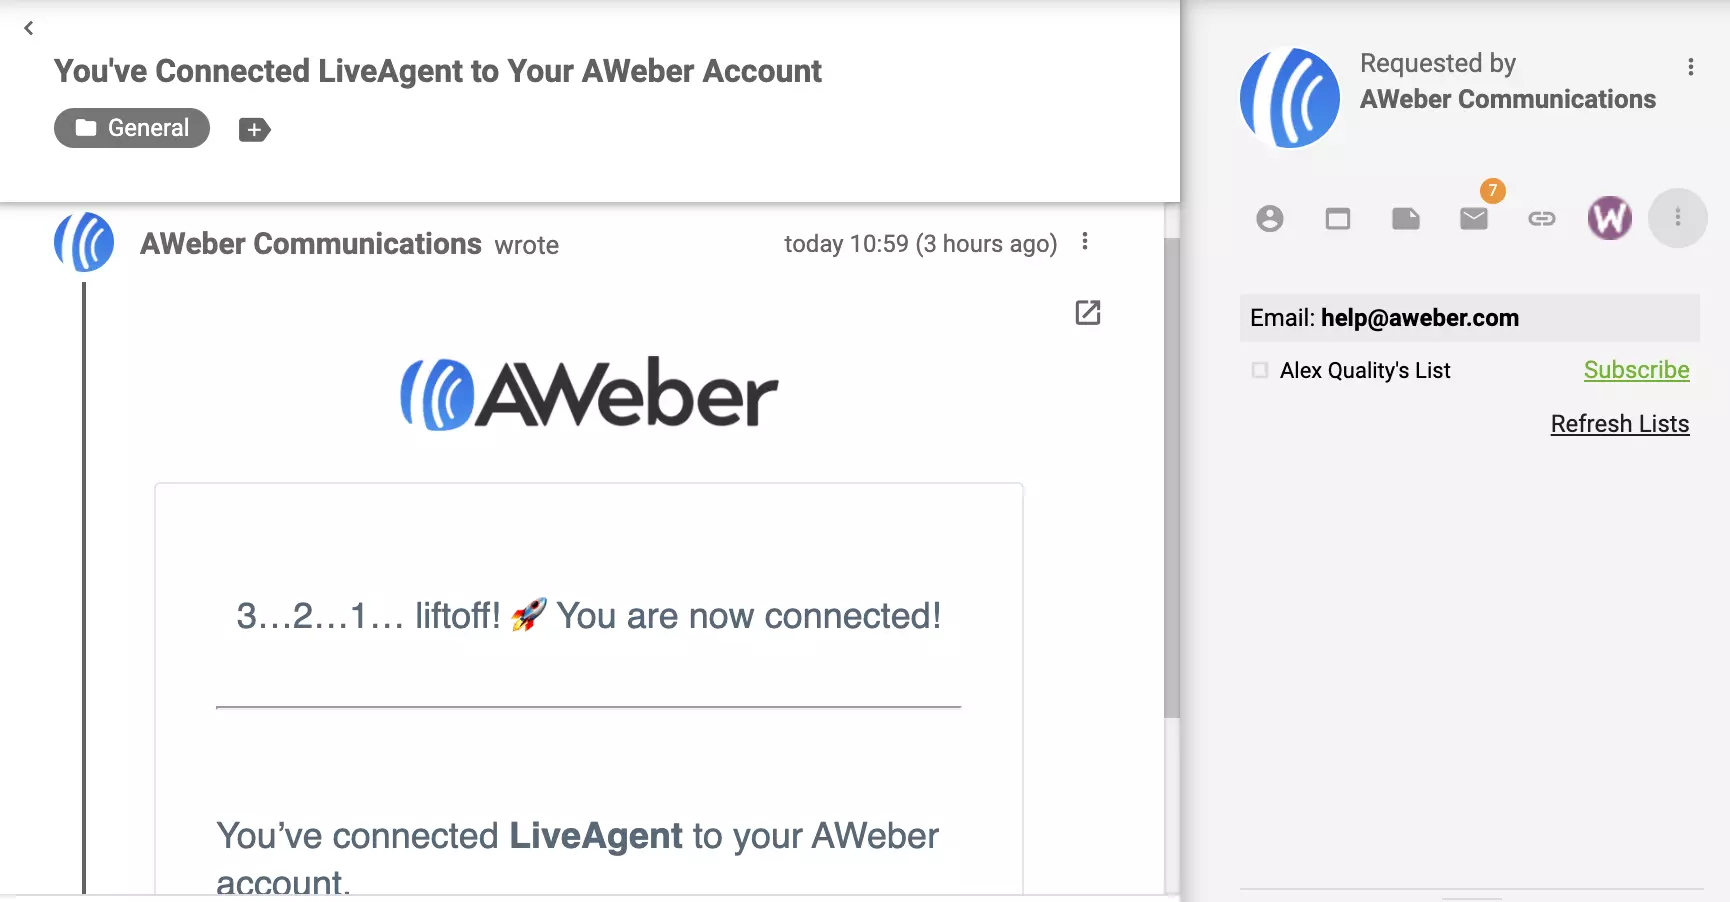
You can add customers and campaigns to separate lists according to your email campaigns in AWeber.

You’re done. Now check your tickets and you can see AWeber in the right panel in your ticketing view.
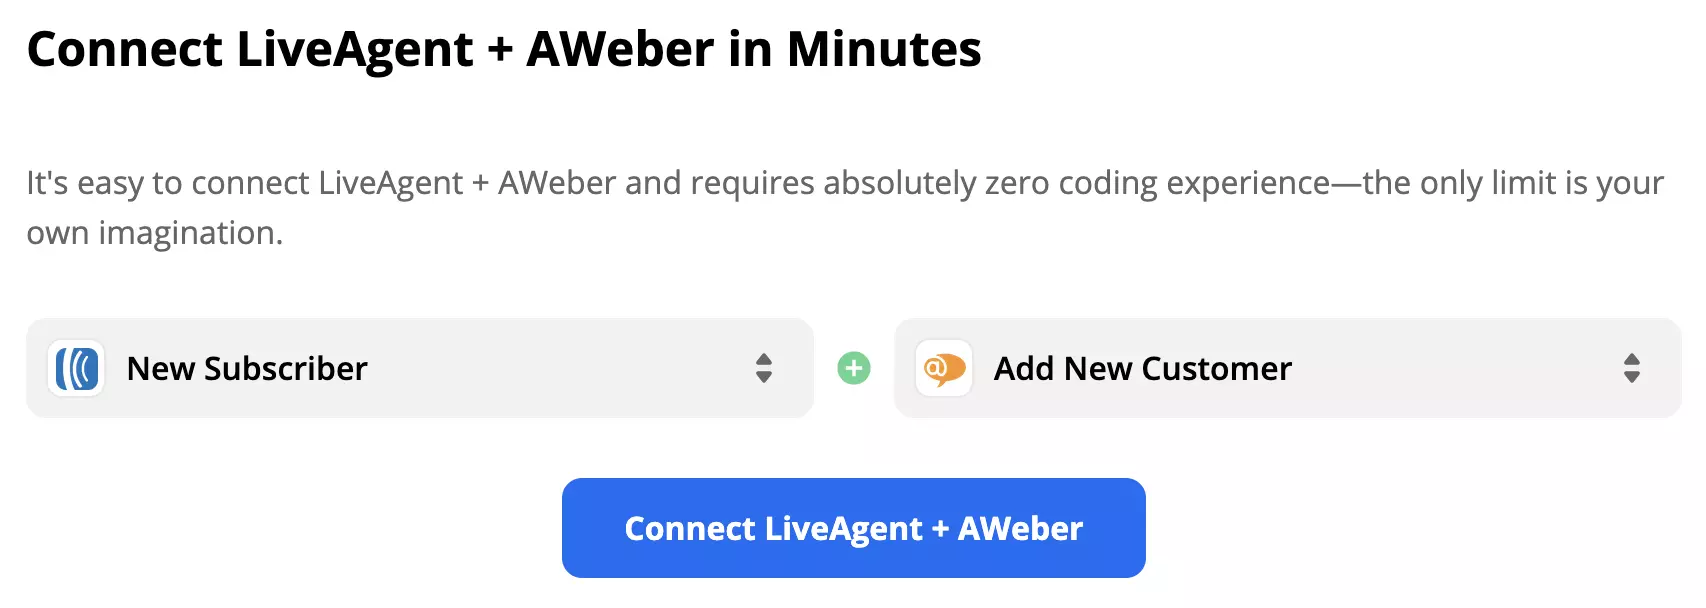
Integration between AWeber and LiveAgent can be also created via Zapier. Create a Zapier account if you don’t have one and proceed to the LiveAgent + AWeber Integrations page.
Scroll down and pick your trigger and action. A trigger in one app will activate the action in the other, creating an integration. Think about what you want your apps to do and take a pick. Since there are a few choices available, we’re going to cover this guide with an example of an integration New Subscriber and Add New Customer. Whether you choose this one or a different integration, the process is fairly simple. When you’re done, click on the blue connect button.
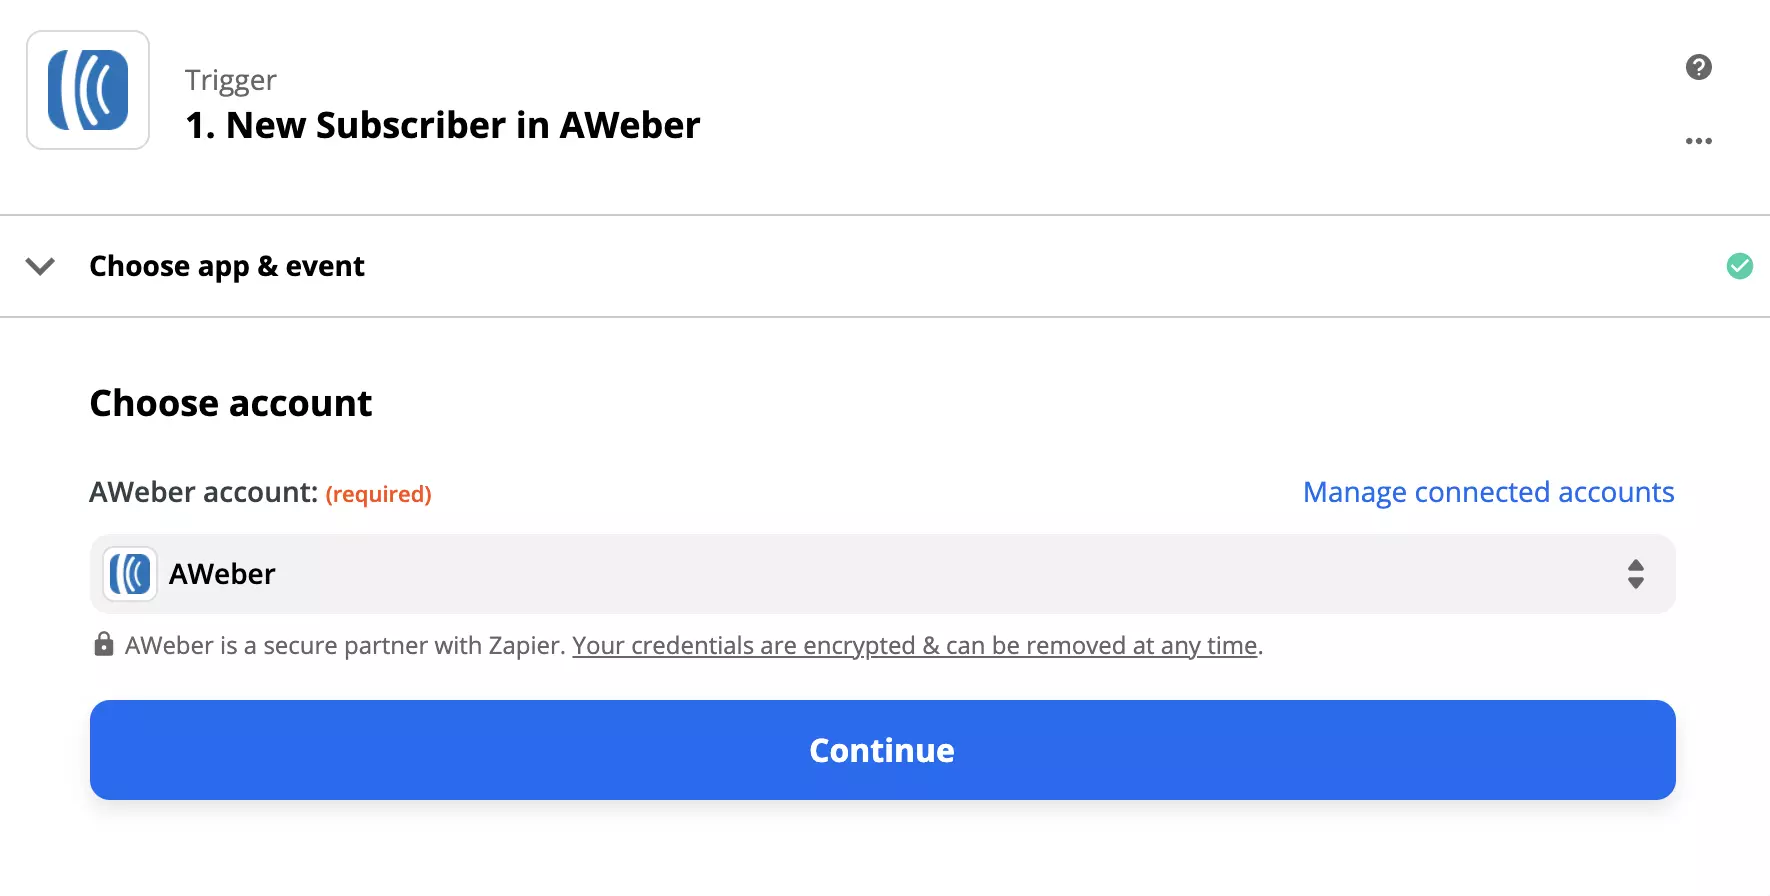
Now set up the trigger. Log in to either your AWeber or LiveAgent account, depending on the integration, and click through the simple process. You can also do a trigger test at the end to see if it works. You can also skip this step.
The action setup might take a bit more time, depending on your pick of an integration. In our case, we had to fill out just the customer email address and a few optional fields to specify what should happen when the action triggers.

When you’re done, do an integration test. It’s not necessary but it will immediately test the integration so you don’t have to do it yourself.
Success! Your AWeber integration with LiveAgent is now complete and ready to use.
No problem! LiveAgent offers a 30-day free trial where you can test the AWeber integration!
ActiveCampaign integrates with LiveAgent to automate marketing, sales, and support processes. Manage customer subscriptions, connect with deals, and enhance wor...

LiveAgent offers email marketing tools to boost customer engagement and sales through personalized content and templates. It integrates seamlessly with other pl...
Mailchimp is an email marketing tool with 3.5 million users sending over 4 billion emails monthly. Integrate with LiveAgent to manage subscriptions directly fro...
Join our community of happy clients and provide excellent customer support with LiveAgent.
Cookie Consent
We use cookies to enhance your browsing experience and analyze our traffic. See our privacy policy.